Master Suite Reveal

When we found out we were pregnant with baby #2 we had to make a decision to either move or make room.  We chose “make room….and then move shortly after” :-/

Although we have already sold our home and moved on to the next project, I wanted to do a quick reveal of the master suite addition that we added on less than a year before we sold.

We took a pre-existing bedroom and added on another 300 or so sq ft to give us a true master suite with walk-in closet and attached laundry room.  The bathroom was still a small space but with a little creativity, we were able to squeeze in a double vanity, roomy shower and a large freestanding tub.

I really wanted to bring the retro look to life by giving it a modern vibe.  Lots of black & white, hexagons and dark grey grout.  I had such a blast picking out every single tile and fixture for the space.

I found a photo on Pinterest that inspired the shelf over the tub.  In the photo I saw online it looked like a protruding window but that would have been rather costly to do.  My contractor thought of the shelf idea and I was immediately sold.  So easy and such a cool place to keep plants and pretty bath stuff :)

The laundry room attached the bedroom was life changing!  When we first bought this house the laundry was in the kitchen.  We then added a room off the kitchen that we made into a “laundry/mud room” but it was still pretty tight.  The units had to be stacked and it was a pain to get from the bedrooms to the laundry.  Moving the laundry in here was not only so much more convenient but we were able to make the mud room a great storage room with a handy mini fridge!

Previous to this addition, our bedroom was upstairs and I had the whole closet to myself as it wasn’t very big.  My husband was then shunned to the hallway closet and part of our child’s closet.  So yea, this was epic…

We actually had planned to go bigger with this space but in an effort to get back to our budget we shaved off some sq ft.  I’m so glad we did because the room was still HUGE.

My husband & I bought this barn door unfinished and stained it to this beautiful dark walnut color.  It’s tied with the tub for the statement piece of the addition.

Stay tuned for A LOT more renovation posts as our new house needs plenty!

Tagged , , , , , , , , , , , , , , , , , , ,

Little People Food

Lately I have been cooking up a storm for the (almost 10 month old) little guy.  Sometimes he eats better than my husband & I.  Seriously.  I really enjoy seeing him try new foods for the first time.  It’s especially fun since he likes pretty much everything.  A little mini foodie, if you will ;)

My good friend has a babe a few months older than Luke and she turned me on to a pumpkin seed & spinach pesto that we love on elbow noodles.  Yes, “we” love.  There are nights I end up just eating his food along with him.  Not only is it tasty but I have no energy left for making my own meal.  She also told me about a salmon cake recipe that Luke really enjoys.

IMG_2260

Salmon Rice Cakes

I also recently did a spin on these meatballs.  I used ground turkey instead of chicken, accidentally forgot to add the applesauce, and threw in some parmesan.  And I found them to be delicious!  The recipe makes a ton so I freeze them and just pop one in the microwave to heat up for a meal (I do this for pretty much all the things I make except the pasta dishes).  I can’t wait to experiment with all kinds of different ingredients in my future meatballs!

IMG_2717

I made pumpkin apple pancakes as a sweet treat for the mornings.  I used just a dash of sugar instead of a tablespoon and I sautéed chopped apples in just a tiny bit of butter with cinnamon to get them real soft before adding to the pancake mixture.

IMG_2718

And lastly in my freezer rotation are these broccoli & cheese frittata fingers.  I happened to have some broccoli & zucchini I needed to use up when I came across this recipe and it was also super easy to make.  I even threw in some green onion that was going to go to waste if I didn’t use it soon.

We have tried some fun pasta dishes that are loosely based on recipes I have come across online.  Some of his favorites included elbow noodles with meyer lemon, ricotta cheese, peas & a dash of garlic powder as well as pastina with cream cheese & grated zucchini.

And some of Luke’s favorite snacks or “side dishes” include peas & carrots, crackers, avocado, brown rice, shredded cheese, o’s, banana, apple & pouches (especially great for on-the-go!).

IMG_3072

This little man not only enjoys eating but he’s a fan of the grocery store and dining out.  Hope he stays this way!!

I am always adding more fun little people food to my pinterest board :)

Tagged , , , , , , ,

Modern Vintage Nursery

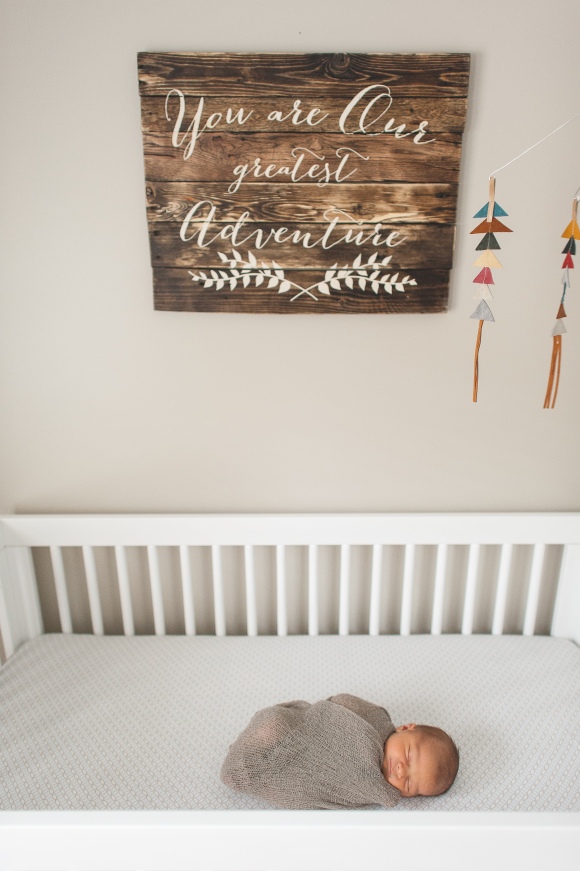
We recently welcomed a new baby into the world.  Meet Luke :)

Luke L Newborn-114

I wanted to wait until he was here and had his photo shoot before I shared his nursery.  It’s been a work in progress for awhile now and we were able to complete it before he arrived.

modern vintage nursery

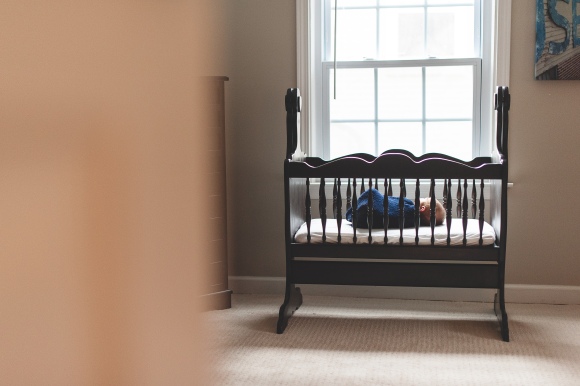
I knew I didn’t want a specific theme or color scheme for the nursery.  I wanted the room to be something our baby could grow into.  We had a few vintage pieces we wanted to incorporate with the newer modern pieces.  We also enjoyed tackling some DIY projects for the room to keep it personal and affordable.  I made the changing pad cover, the throw pillows and the triangle quilt.  My husband made the window valences and my Dad made the changing pad holder that he attached to the dresser.  Luke also has three other handmade blankets from other loving family members.  He was also gifted a handmade cradle by a family friend.  We keep the cradle in our bedroom but still want to share a photo of it.

modern vintage nursery

modern vintage nursery

modern vintage nursery

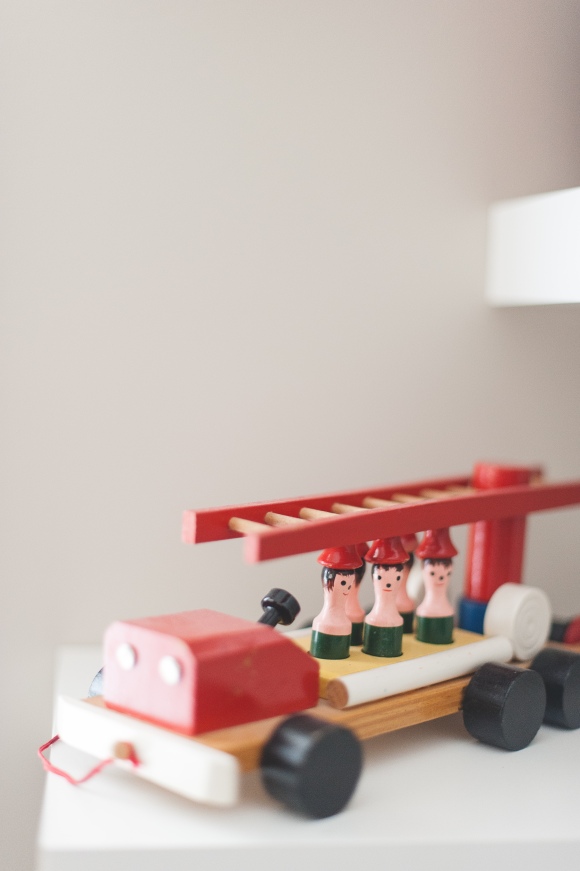
Some of my personal favorites in the nursery are the mobile, the wooden sign above the crib, the vintage toys on display and the rug!

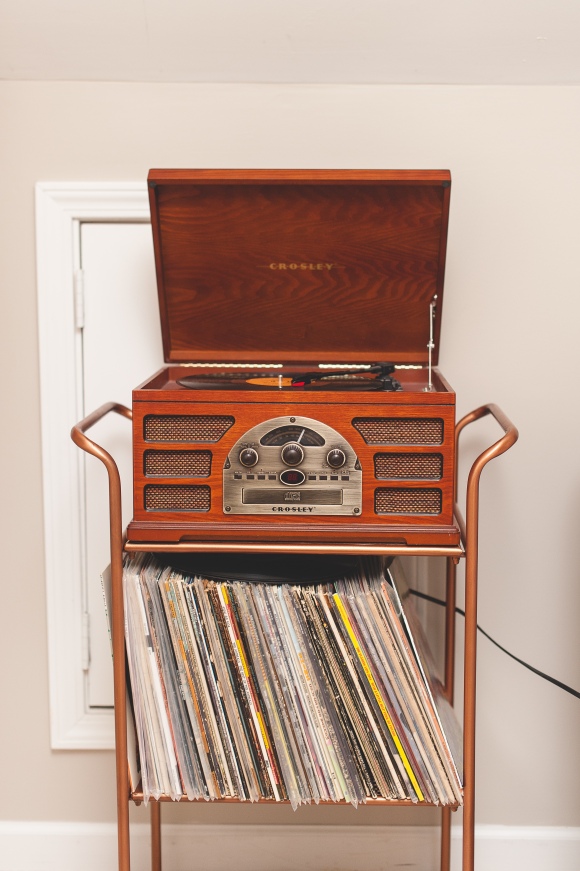
Before this room was a nursery, it was really just a room for all of my husband’s music & sports stuff.  We thought it would be cool to keep the record player in the nursery.  This way we can introduce the baby to music early on…and also because we don’t have enough room downstairs for ALL of the record collection.  Might as well store some in the nursery!  We also had to put some of my husband’s guitars away but thought it would be nice to keep one on display in the room.  The only other thing that stayed was the futon.  However, I did get a new cover for it to spruce it up a bit.

Luke L Newborn-169

modern vintage nursery

modern vintage nursery

Luke’s Nursery was also featured on Project Nursery’s “Rooms and Parties We Love This Week” :)

Photography- Katey Penton Photography

Project Details

Nursery Paint Color- Benjamin Moore Rever Pewter

Crib- Babyletto Hudson 3 in 1 Convertible Crib

Crib Bedding- Living Textiles

Changing Pad Cover- Handmade by Megan (Mom)

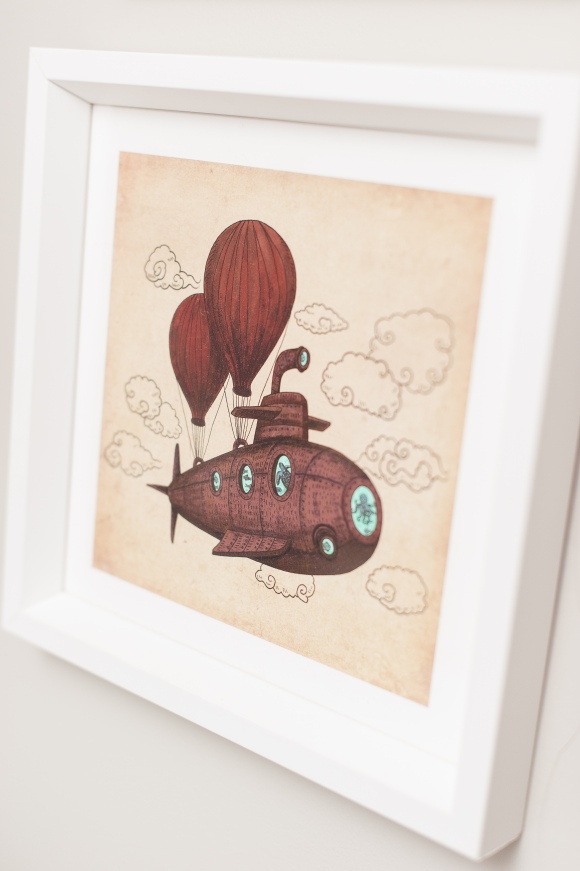
Wall Art Prints (above changing dresser)- Society6

Wooden Sign above crib- Devenie Designs on Etsy

Vintage Norman Rockwell Print- Unbelievable Finds on Etsy

Crib Mobile- The Alison Show

Fox and Alligator- Anthropologie

Throw pillows- Handmade by Megan (Mom)

Cedar Chest- Heirloom from Megan’s Great Grandmother

Changing Pad Frame- Built by Baby’s Grandfather

Window Valences- Built by Baby’s Dad

Toy Chest and Rocking Chair- Megan’s from when she was young

Vintage Wooden Trucks- Dad’s from when he was young

Blue Triangle Quilt- Made by Megan (Mom)

White Knitted Blanket- Knitted by a Family Member

Blue Knitted Blanket- Knitted by Baby’s Grandmother

Square Rag Quilt- Knitted by Baby’s Great Aunt

Glider- Buy Buy Baby

Ottoman- The Land of Nod

Futon- Ikea

Futon Cover- ComfortWorks

Red Dresser- Ikea

Wardrobe- Ikea

Record Player Stand- Urban Outfitters

White Floating Shelves- Ikea

Hanging Light- Pottery Barn Kids

Rug- Overstock.com

Hamper- Target

Side Table- Amazon.com

Table Lamp- Target

Tagged , , ,

Multipurpose Room Reveal

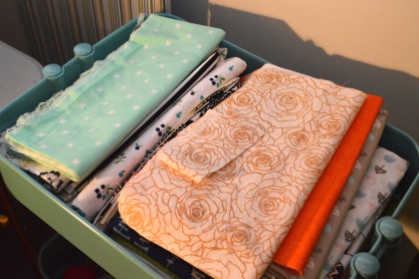
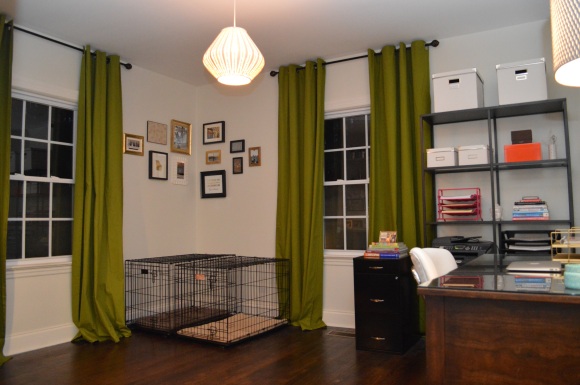
The past few months have been all about nesting for me.  It all started with our shed.  We knew we had to get our storage system under control in order to get the inside of our house organized.  The next step was to make my office more efficient.  I needed to keep a work space in the room as I work from home.  I also wanted to make room for my sewing machine so I would be more likely to use it.  And last, I needed to be able to fit our two dog crates in the room.  So it needed to be multipurpose but also a room that enticed me to work & craft.

I began searching online for inspiration before making any big moves.  Of course a pinterest board was created for the project to get my ideas together.  One of the ideas I came across that really stood out was the pegboard for my craft corner.  I thought it was super useful and I also loved the way it looked.  I found this particular pegboard and wanted to create almost the exact look.  I love her whole workspace really – especially that wallpaper!  However, the wallpaper wasn’t in the budget.  Those shelves though?  They were going to have to happen for me.  So now to try to replicate this dream workspace!

DSC_0524

DSC_0521

First on the agenda was the pegboard.  My husband did the majority of this project.  We measured the wall and went to Home Depot for the board.  They happened to have white pegboard which was great so we didn’t have to worry about painting it.  We then used a combo of directions from this site & this site to actually hang the pegboard.  Once the board was up, it was time to organize.  Home Depot sells packs of assorted pegboard hooks which are a necessity.  I also took several of the ideas from my original inspiration – the spool holder is from Hobby Lobby, the small buckets are from target, the fake plants are from IKEA, the shelf is a piece of painted wood from Home Depot that I had them cut, the baskets are from Hobby Lobby (I spray painted them black) and I found the clock on Amazon.com.

I already had the folding table and as much as I wanted a sleeker sewing table, I also wanted to utilize things I already had.  So instead I just spray painted the legs to spruce it up a bit ;)  I also just rotate my chair back and forth from my desk to my sewing table.  It works for now but I may get a second chair down the road.

Had to have some photos of my super crafty Grandmom on my pegboard.  She would have loved this!  I also loved the idea of fake plants and a clock from the inspiration pegboard and therefore had to copy.  It looks adorable AND I cannot easily reach up there so it would have just been unused space.

This cart is another IKEA find and is great for extra storage.

DSC_0506

DSC_0519

I love white desks as well as clear top desks but I already had this one and it’s perfect for the space.  This is actually my husband’s old desk from when he lived at home with his parents.  I did upgrade my desk chair which helped brighten up the desk area a bit.  The wine cork board above my desk is from our wedding.  My dad made the board and it was placed on an easel at the wedding to display the table assignments for dinner.

DSC_0516

Then for those shelves I had to have – IKEA of course.  I also took her idea of the white boxes from Ikea and paper organizers.  I loved the look of her shelves so like her pegboard, I pretty much mimicked the shelves.  I even loved her color scheme throughout her workspace of gold, black & white but I found that I personally needed more color in my space.

DSC_0509

The other “purpose” of this room was a dog crate space.  Dog crates are not the most attractive so I wanted to pretty up that corner any way I could.  I love a gallery wall and since there was so much wall space above the crates, I decided take it to the next level and create a corner gallery wall.  I chose to stick to gold, black & white on the gallery wall.  Some of the frames were ugly and outdated but easy to repurpose with some spray paint.  I used a random assortment of things to fill the frames including magazine ads, fabric, and gold foil prints.

DSC_0545

DSC_0544

DSC_0534

I was in search for the perfect black & white curtains but after being curtain-less longer than desired, I finally settled on these green curtains.  My husband actually suggested them and I think they work great.  I had fallen in love with so many clean white office spaces online so I had the room painted a shade of white.  Sadly, I immediately regretted it.  I have since realized I’m a color gal.  Thankfully, adding pops of color throughout and especially the green curtains really helped to overcome all of the white paint.

I still cannot decide if I will get a new rug for the space or not.  It’s one of those things that I just want to come across one day.  It’s never a good idea to rush a rug purchase!

All in all, I am very pleased with my workspace/craft room/dog crate area.  I believe it’s important to have a space that evokes creativity and effectiveness.  So far this space is doing both of those things for me!  And I think the dogs enjoy it too ;)

Tagged , , , , , , , , , , , , ,

Grilled Pizza

Long time, no post!  I got a new camera recently and wanted to test it out on a blog post.  Unfortunately I am a total newbie so my photos aren’t too great.  I should have been using my extra flash but on the actual camera the photos were looking too bright.  Anyway, I am taking some classes this coming November so more to come on that.

My husband and I have been grilling pizza for awhile now.  It gives the pizza a totally different taste – almost more of an authentic taste with the slight char on the crust.  Whatever it is, we haven’t cooked a pizza in the oven since we discovered this new method of cooking our pies.  It’s rather easy too but does take a few times before you really get the hang of it.

I typically take care of prepping the dough (which is super easy considering we buy pre-made dough) & coming up with the toppings.  And my husband is the grillmaster.

DSC_0163

Like I said, I buy the pre-made dough in the bakery section of our grocery store.  It needs to sit out at room temp for about an hour before rolling it out.  Once it’s ready to roll, I make sure I have a clean counter top and sprinkle flour down to prevent sticking.  I then just roll it out with a pin adding more flour as necessary.

DSC_0166DSC_0172

Shape doesn’t matter so don’t strive for perfection.  Just do your best to get most of the bubbles out.

While I’m doing all the prep work, my husband is getting the grill ready.  We have a Louisiana Grill which runs on pellets.  The grill needs to be super hot for pizza grilling so we shoot for 500 degrees.

DSC_0174

For this particular pizza, I decided to do a white pizza.  We’ve done allll kinds of toppings in the past though.  You can really get creative with homemade pizzas which keeps it a popular dish to make on a regular basis.

I sliced up some garlic and sauteed it in some olive oil.  Once the garlic started bubbling, I added a bag of spinach to the pan.  Once the spinach wilted, I removed the pan from the heat and set aside.

DSC_0165

DSC_0175

DSC_0176

I wanted to have some of my toppings ready before we put the dough on the grill.  The dough is on the grill for a very short period of time and once the toppings go on, it goes back on for another quick minute.  Because we don’t want the grill to lose heat, we need to plan accordingly.

Before putting the dough on the grill, we brush the grill gates with olive oil.  We do this by balling up a paper towel which is dipped in olive oil and rubbing it on the grates by holding the paper towel wad with tongs.

Then we brush the dough with olive oil too.  The dough then gets placed on the grates olive oil side down.

DSC_0177

DSC_0181

Let the dough grill about 1-2 minutes with lid down.  Use tongs to check the dough after 1 minute.  You want grill marks but you don’t want it completely crispy.  When ready, remove the dough with tongs.

You lay the uncooked side down and place toppings on top of the cooked side.  For this particular pizza I used  white pizza sauce that I found at the grocery story made by Classico brand.

DSC_0183

I then made a mixture of ricotta, shredded mozzarella & grated parmesan.  Oh and more garlic of course!  Minced this time.  So then I spread the cheese mixture on top of the sauce, then the spinach mixture, and then I topped it off with some fresh basil and italian seasoning.

DSC_0182

Once your toppings are on, it’s time to get the pizza back on the grill to finish cooking the other side.  The pizza should only be on the grill for about another minute on the same high temp as before with the lid down.

DSC_0184

DSC_0185

DSC_0186

And there you have it!  A delicious grilled white pizza!

DSC_0193

DSC_0194

Grilled Pizza

  • Heat the grill: You should heat it quite hot; Aim for at least 500°F. If you have a choice on your grill between direct and indirect heat, set it up so the pizza is over direct heat.
  • Have your tools close to hand: You will want a pair of long metal tongs. A spatula may be helpful, although not absolutely necessary. You may want a hot pad or oven mitt if your grill lid gets hot.
  • Prep your dough: It should be stretched or rolled out into a thin circle.
  • Brush the dough with olive oil: Brush one side of the dough with oil; this is the side you’ll lay down on the grill.
  • Grill one side of the pizza: Take the lid off the grill. Lay the dough round on the grill, olive-oil-brushed-side down. Brush the top of the dough with a thin layer of olive oil too. Let the dough cook for about 3 minutes, with the lid off, or 1 to 2 minutes with the lid on. Use the tongs to lift up the dough from time to time, checking on how it is doing. You want grill marks on it, but you don’t want the dough to get crispy; it should be just set.
  • Top the pizza: Flip the dough over with the tongs or spatula. The dough should come up easily and flip without tearing. Now is where your organization comes in! You need to top the pizza quickly. Spread on a thin layer of sauce, some cheese, and toppings. It shouldn’t be too heavily loaded, or the pizza won’t cook well.  (I never just flip it on the grill and put the toppings on while it’s on the grill.  I would be too panicked to get it all done quick enough.  I like to bring the pizza back in the house and quickly arrange the toppings before putting it back on the grill)

I hope to make a pizza with homemade dough in the near future.  I’ve attempted before but it never turned out well :-/

Tagged , , ,

Vegetable Garden Canopy

I asked my dad to provide step-by-step instructions on how he made a canopy for my veggie garden so I could post it on my blog. Instead, he sends me an entire blog post sans step-by-step instructions…but blogging is the hard part so thanks Dad!

MY SPRING VACATION…

My latest visit to Decatur, Georgia was in early May right around planting time. My very ambitious and creative daughter Megan asked me what could be done to prevent the critters from invading her veggie garden. Megan has a way of sparking my interest, and always has a project for me when I get a chance to visit. She puts the to-do list on the imaginary blackboard. This is a reference to her Grandmom, but I digress. Taking on projects for Megan only adds to the experience of visiting and allows me to make some sort of creative contribution to the home. In other words, I secretly love it, but don’t tell her!

THE VEGETABLE GARDEN CANOPY…

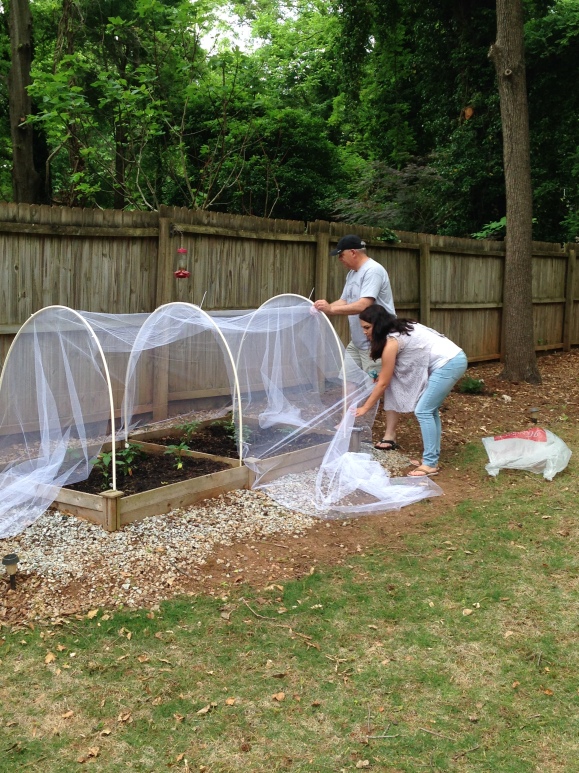
OK, so the topic for this blog is how to protect the plants from getting bothered by insects, birds and squirrels. Since time was a factor and tools are limited in the Lyons den we had to improvise. Megan suggested building a wood frame and attaching a wire screen with a trap door that would open so the plants could be tended to and veggies could be harvested. I could visualize the entire project but how would we cut the wood? What sort of wire screen would we use and how much time would it take to construct such a contraption? Needless to say that idea was scrapped. The next idea was a PVC tubing design from a website I think but I am not much for reading instructions so improvisation here we come. We hit the Depot and got some 1 inch PVC pipe, some ½ inch PVC and a bag of nylon wire ties. Earlier Megan stopped at the fabric store and bought some white mosquito netting. I don’t remember the lengths of the PVC tubing or the number of yards of netting but does it really matter? Hopefully, Megan will attach a photo of this amazing project (amazing because I am amazed that it worked) so you can get a visual. Anyway, we drove the 1 inch PVC into the ground and that provided a receptacle for the ½ inch PVC. I guess the instructions were to use ¾ inch PVC so it would fit tighter but this is working so please don’t judge us. We bent the ½ inch PVC pipe into arches and put one end in each of the 1 inch pipes previously driven into the ground. Did I mention that Megan was out there the whole time, helping and directing? Where does she get that from? So, we constructed the frame and proceeded to attach the netting to the frame with nylon wire ties. Loose ends of the netting were gathered at the ends and tied and a few of the nylon ties on the ½ inch pipe were left loose in the front so that the netting can be lifted to access the veggie garden. The key here is confidence. Megan asks, “Dad, do you think this is going to work?” Dad says, “Of course it will work”. Meanwhile, I had no idea what was going to happen. I could see visions of squirrels chewing the netting to bits and laughing as they hauled it up a tree to make a hammock for their babies. I wondered if one strong gust of wind would take the entire canopy airborne and send it to the city of Atlanta like a balloon let go by a spoiled little kid that didn’t really want a balloon to start with but the parents thought it would be cool. Don’t ask me how much it cost since Megan bought everything which is another part about the project that I liked! I could go on and on but the truth is this was a very easy project and was done in a few minutes. Not to downplay the result, because from early reports the canopy has kept the critters at bay and has survived a monsoon rainstorm. Good luck Megan and I am putting in my reservation for some hot peppers to put on that roast pork sandwich in July which I forgot to request until now.

photo 2

photo 1

So that was my surprise guest blog that I never saw coming!  Pretty good for his first one, right?

And now I will attempt to explain the step-by-step instructions:

I think we used this link as a guide but my Dad clearly isn’t one for following instructions.  Luckily, everything he does turns out pretty awesome.

We got three long pieces of the 1/2 inch pvc pipe (maybe 8 feet long each).  They were whatever size Home Depot sells so we didn’t have to cut them at all.  But I suggest maybe getting 3/4 inch so they fit more snug.  We just shoved little sticks in next to them to secure them in the 1 inch pieces.

We bought 3 pieces of the small size that Home Depot sells of 1 inch pieces.  They were about 2 feet at Home Depot and we cut them each in half with a hacksaw to have 6 total pieces.

So we hammered each of the 6 1in. pieces into the corners and then put the long pieces into 3 loops securing them in the 1in. corner pieces.

I went to Hancock Fabric for the netting and didn’t get my width & length right so we had three pieces to worth with but you really just need to measure your own garden and get enough fabric to cover it.  We used wire ties to secure the netting to the piping and to connect the 3 pieces of netting together.

Anyway, the canopy is working great so far!  No veggies to steal yet but normally critters love just digging in my gardens and haven’t had any of that happen yet.  Also, there are NO bug bites on any of my plants!  Hopefully it continues to get the job done all season!

Updated photos two weeks later below! Had to pull up the netting to add cages:)

20140528-231816-83896165.jpg

20140528-231817-83897369.jpg

20140528-231815-83895181.jpg

Tagged , , , , , , , , , ,

California Dreamin’

Well look at that…it’s already the middle of May!  I haven’t blogged in a month or so as I have been somewhat detached from my reality.   But I’m back to my office and now sharing my experiences is going to have to be my “fun” for awhile…or until my next trip!

I’m not one to sit still for awhile.  I like having things to look forward to – mainly vacations.  But with my job as a Realtor, I have to be in Atlanta for more time than I would like.  Don’t get me wrong – I LOVE ATL!  But I also realize how huge this world is and I am determined to see a lot of it in my lifetime.  I have a loooong way to go…

April was a damn good month, I must say.  Laguna Niguel, LA, Aruba..  sort of a big deal for little ol’ me.  Just going to touch on my CA trip for this post to keep things short (I’ll try my best) and sweet.  One of my close girlfriends had a reward trip in Laguna Niguel for her company (because she’s awesome and hit her goals!) and she wanted to stay longer than the actual planned trip (because who wouldn’t?!)  but her boyfriend had to go back to work and couldn’t stay that whole time with her.  Luckily, I was available!!  I’m a great fill-in for amazing trips if anyone else finds themselves in this predicament FYI! 

So I flew into LA on a Sunday and hopped in a rental to head to the Ritz-Carlton in Laguna Niguel.  Oh but I was starved when I landed so I had to make a very necessary pit-stop…

photo 1(2)

(In-N-Out is a big deal for us east coasters who don’t have the luxury)

There were even some kids handing out In-N-Out gift cards to people in line to encourage people to come to church or something like that.  Thanks for the burger, Jesus!

So I scarf down my animal style burger on the way to Laguna and it was MAGICAL I tell you!  MAGICAL!  Driving those Cali roads, In-N-Out in hand…basically heaven.

Little did I know this trip was only going to get more magical (OK I sorta had a hunch)..

I finally get to the Ritz and meet up with my friend and we head straight to the pool!  Bevs & pool.  Yes please!  That night we went to Laguna Beach for dinner.  Ate at a place called Alessa.  Good food and nice romantic atmosphere..not that we were being romantical but you get it.  Meats, cheeses, pastas…oh my!   I even chatted up the hostess to get some deets on Laguna Beach (not the location…who cares about that?!  The SHOW.  DUH!).

The next day we did a yoga class over looking the ocean, had some beers on the beach, back to the pool, relaxed on our patio (complete with fireplace) for a bit before heading back to Laguna Beach for shopping and dinner.  #reallyroughlife

We went to Laguna Beach (a few miles away) a little earlier the second night to do some shopping.  There are a ton of cute shops in the area!  Then we went to a roof top bar to watch the sunset over the ocean before heading to Carmelita’s for dinner.  I had researched some restaurants before the trip and Carmelita’s had rave reviews, however none of the locals had heard of it (turns out it’s really new).  Luckily I ran into an old co-worker who now works at the Ritz in Laguna and she confirmed that it was amazing.  And that it was!   All I have to say is “strawberry jalapeno margarita”…O.M.G.  Although all of their margaritas sound amazing.  Man, this is hard to write while detoxing (yes, because of all these vacays lately I am doing the 2 day detox…yet again)..

The next day we drove to LA to spend a night there before heading home.  Quick trip for me in general but enough to leave me wanting more (of both Laguna & LA).  We didn’t have much time in LA but once we got checked in to the Chateau Marmont (ahhhhmazing…and so much history), we went to see all the shops and may have had some sprinkles cupcakes while doing so..

Later that day we started getting ready for our night out.  First stop, SUR, for drinks.  Only the coolest people will know how crucial it was to go there.  And yes, I saw some of my favorite D-list celebs (judge away!!).  We then went to AOC for dinner.  We sat in the courtyard which was super adorbs.  Later that night we went to Bar Marmont where we had the most amazing jalapeno margaritas (what is with me and jalapeno margs?  I even started making them at home recently).  We also spent time in the outside part of the main hotel restaurant several times over our short trip and the pool bar for a bit.  I definitely want to go back to that hotel one day.  I like that it has not been updated…although it makes for a real challenging hair & makeup experience..

Overall, it was an amazing trip and alllll thanks to my wonderful friend!  I really cannot thank her enough!

P.S. California, if you are reading this, I miss you a lot!

Tagged , , , , , , , , , , , , , , , , , , , , , ,

2 Day Detox

So I have been MIA recently from not only this blog but from bootcamp, my home, my healthy eating habits..

A few weeks ago I got plantar fasciitis in my left foot.  If you aren’t familiar – it’s basically a pain in the heel of your foot that can extend throughout the foot and up the calf due to inflammation.  I noticed a mild pain in my heel but didn’t know what it was and then went to bootcamp a few days later and ran about a mile and a half and then basically couldn’t walk on my foot anymore.  So I essentially made the problem way worse since I didn’t know what it was to start with and therefore never attempted to fix it.  I ended up taking a break from the work outs and instead spent time icing & stretching my foot as much as I could.  I will admit that I also turned to comfort foods from time to time during my pause from the active world.  Then I had a short trip to California (will blog about that soon) where I had to hobble around but at least I was surrounded by beautiful scenery.  And I did get to do some waterfront yoga one morning (only workout in the past 3 weeks!).  But of course I splurged calorie-wise in Cali too.  So shameful.

All that being said, I decided it was time to attempt the Arden’s Garden 2 Day Detox.  I have considered it for some time now but didn’t want to do it when I was working out and didn’t really want to take two days off from working out.  Well, I had no excuse now that I couldn’t work out.  I like the idea of it mainly because it’s only 2 days!  You can do anything for 2 days!  Right?  Well, it’s easier said than done…at least in my case.  Side note: The day I started (this past Monday) was the first day I woke up with no pain in my foot.  Go figure.  Not that I wanted to jump back out that first day it was feeling better and run but still…just ironic.

From Arden’s Garden website:

What: The 2 Day Detox is a special formulation of fresh juices – grapefruit, orange, and lemon – that helps you cleanse, detoxify, and rejuvenate your body.

How: For two days you give up all foods and in their place, you flood your body with vitamins, minerals, amino acids, enzymes, and other phytonutrients. You drink 8-12 ounces every hour until the total 128 ounces have been consumed. That’s it!

Why: The 2 Day Detox will help you lose weight, detoxify your body, improve your immune system, and boost your energy. The fresh citrus juices supply your body with vitamins, minerals, and antioxidants that provide more than 100% of the United States Recommended Daily Allowances (USRDA) of the 12 essential vitamins in every serving.

Arden’s Garden stores are only located in Atlanta but you can order the detox to be shipped to you or you can follow their recipe on how to make the detox yourself.

Image

My breakdown of the past two days:

Day 1

AM – Pour my first glass and feel real motivated and ready to tackle my gallon of juice for the day!  Things aren’t so bad.

As the day goes on I get spurts of hunger but just drink more juice and it fades away.

Around 5PM – I wonder how I am going to make it.  All I can think about it food.  Opening the fridge to pour more juice just pains me – I can see all that foooood in there!

6PM – I cave and eat a handful of mixed nuts.  I regret this move.  BUT for my first time ever detoxing….I’m not thaaat mad about it.

Around 10PM – I give up leaving probably 10 oz in the first gallon.  Mind you, I’m also trying to drink distilled water throughout the day so I feel like I might drown myself and literally cannot take one more sip of liquid.

My husband was scared to come home after work but was surprised with my good spirits…and the fact that I didn’t try to eat his arm off.

Day 2

AM – Woke up and weighed myself and was down 4 lbs from the day before.  Just what I needed to get me excited about this pulpy grapefruit juice. (I hate grapefruit. I hate pulp.)  The juice is made from distilled water, grapefruits, lemons & oranges but all I can taste is the bitter grapefruit.

Midday – Feeling shockingly great!  Today is much easier than yesterday!

PM – Energy kicks in and I go nuts cleaning the house.  I can’t tell you the last time I felt this energized.

I drank what I had leftover from Day 1 plus 98% of the second gallon.  Again, I just couldn’t finish probably the last 8 oz.  Oh well!  At least I didn’t cheat by eating any food today.

PROS:

– I lost 6 lbs when it was all said and done.  I’m sure most of those will be back in the next meal or two but it was motivating to see along the way.

– My energy level soared as time went on.  And with no caffeine?  Awesome.  I’ve read you can do this cleanse for more than 2 days and I’m sure it just gets easier and shows even more benefits.

– I felt as though my skin had a glow.

– By day 2, I was craving nothing but veggies.  Spinach & spaghetti squash in particular.  I wanted nothing to do with bad carbs that I was craving on day 1!

CONS:

– I had a hard time finishing the gallon each day on top of all the distilled water I was consuming (probably at least 32 oz a day).

– I am not a fan of grapefruit or pulp and that’s basically what the juice tastes like.

– The days lasted soooo long!

Overall I think the pros outweighed the cons.  I definitely see myself doing this cleanse in the future.  It’s a great way to kickstart healthy habits or even to shed some quick water weight before an event or vacation.

Oh and if you want to make this detox on your own, here is the recipe:

What You Will Need For The Two Days:

48 oz. fresh grapefruit juice
32 oz. fresh orange juice
16 oz. fresh lemon juice
160 oz. quality steam-distilled water
Empty 1 gal. jug for mixing
Funnel (optional)

What To Do:

Mix together for each gallon:

24 oz. fresh grapefruit juice
16 oz. fresh orange juice
8 oz. fresh lemon juice and
80 oz. distilled water

Each day, drink 8 oz. every hour until the total 128 oz. have been consumed and that’s it.  And no food!!

Would love to hear your experiences with detoxing in the comments!

Tagged , , , , , , , , , , , , ,

My Inspiration

Excited to introduce my first guest blogger!  She is someone I have always admired for many reasons and recently she just gave me another one – reaching her weight loss goals and continuing to live a healthy life!  Meet my aunt/godmother/friend/inspiration…

My Weight Loss Journey

I have been dieting ever since I can remember.  At the age of 10 my mother put me on what I now refer to as, “The Root Beer Barrel Diet.” She thought I was overweight because I was always asking for something to eat.  So, in her infinite wisdom, she decided that anytime I asked for food she’d give me a root beer barrel candy and it would satisfy my hunger.  Needless to say, it didn’t work, and to this day it stings a little when I see that candy. There were so many better ways to respond to me and it would have been a great opportunity to teach me about eating a healthy, balanced diet. Alas, that did not happen.  Parents of past generations just didn’t seem to focus on diet and exercise.  If she had even the slightest comprehension of the WeightWatchers (WW) philosophy regarding healthy attitudes and behaviors, I would not have spent the next 40 years of my life struggling through fad diets and failing each time.

In preparation for my niece’s (who just happens to be your blog writer) bachelorette party in Las Vegas, I tried once again to loss the weight. I failed to lose even a pound. A week before the trip, a co-worker came to my desk and told me about WW online.  He left my desk and never pursued it further. I, on the other hand, went online immediately and started reading about WW. My bestie had been on WW about a year earlier and lost 15 pounds so I called her up.  Her advice was:  “Just do it. Don’t do it online. Go to the meetings. Don’t tell anyone you’re doing it, and you can do this!”

That was July 2011.  I lost 3 pounds the week of the bachelorette party in Vegas.  By Megan’s wedding that September I was still overweight but I was really feeling positive about the program and my steady weight loss.

The July it will be three years that I stepped into that WW meeting room and since then I can honestly say I have never been prouder of myself and the lifestyle I created thanks to WW.  I was successful because of the WW PointsPlus Program and my commitment to it.  The famous Irish poet Oscar Wilde said, “Do you really think it is a weakness that yields temptation? I tell you that there are terrible temptations which require strength and courage to yield.”  WW gave me the tools, the strength and the courage to lose 43 pounds in 9 months.  Today, I’m down 55 pounds and I’ve been a lifetime member for 2 years.

The meetings grounded me and inspired me to keep going and to stop what my leader, Rick, refers to as, “stinkin’ thinkin’.”  I now view healthy eating as a permanent lifestyle versus a temporary fix to meet an unrealistic goal.  When someone asks me how I lost the weight, I start by saying, “WeightWatchers.”  When they ask for more details, I gently but passionately tell them that they should only join if they want to develop healthier eating habits and experience a personal transformation that will change their life forever.

I celebrate my success by staying on plan.  I attend meetings every Saturday morning and I actually have women there that have become an important part of my week. The journey I started the day I walked into my first meeting will continue for the rest of my healthy eating life.  Inspiration can be found in the rarest of places.  What will it take to inspire you to change your bad habits, create good ones, reach your destination and learn how to successfully continue your healthy journey?

Before

Before

After

After


Tagged , , , , , , , , ,

Losing is winning

So the weight loss challenge (mentioned in a previous post) ended yesterday.  Before I talk about the final weigh-in, let me just recap how the whole journey went.  This was a 7 week “biggest loser” challenge that my bootcamp instructor organized.  By week two, I lost about 7 lbs.  About 5 of those pounds quickly came back.  I had been eating “healthy” and going to bootcamp 2-3 times a week along with a pure barre class once a week.  I didn’t understand why I wasn’t losing more and was even gaining some back.  It was time for a reality check.  Food was the problem.  I wasn’t actually eating healthy at all.  My bootcamp instructor asked me one day “What did you eat for breakfast today?”  A hard boiled egg…just the white.  “ONE egg?  That’s it?!”  He told me to eat at least 2 egg whites, two slices of turkey bacon and an apple.  He also told me to eat a lean meat or fish for lunch along with a veggie.  Tuna alone wasn’t going to cut it.  My body was going into starvation mode because I wasn’t eating enough and therefore was retaining any and all fat it could.  My other problem?  Snacking.  Of course I didn’t admit this to him but deep down I knew it was a big reason why I wasn’t losing weight.  A few pita chips here and there or eating some pretzels while watching tv at night…it had to stop.  I also have cut back on alcohol.  A few glasses of red wine a night used to be pretty normal for me.  I try to completely avoid drinking during the week now.  If anything I will have a small glass of red once or twice a week.  I drink more on the weekends but stick to light beer or wine for the most part.

This past week I made a decision to stop the senseless snacking completely.  Veggies & fruits were allowed and some nuts (1/4 cup a day if hunger struck sometime before dinner) but that was it.  It definitely made a huge difference.  I ended up losing a total of 5lbs at the final weigh-in.  Would have liked to see a number more like 10 but I was just proud that I was able to drive that number back down from what I re-gained in the early weeks.  I also just felt a lot better and I even noticed my clothes fitting better this week.  So why didn’t I lose more?  Because that theory I was hoping was true actually was true – “it’s because it’s turning into muscle”.  He also tracked our body fat percentage at our initial weigh-in.  At the final weigh in my body fat was down 3%.  I’m going to get discouraged by the scale every now and then because of that but need to push through.  Ideally I want to be down 4 more percent.  I plan on having him check my body fat % again in a month to ensure it keeps going down.

Things that have worked for me:

– Eating more for breakfast & lunch.

– Avoiding bread & cheese as much as possible.  Focusing more on lean meats, fish, and vegetables.

– Completely avoiding sweets & salty snacks.  After a week of doing this, I have no interest in eating these foods that I used to crave.  I’m not saying that I won’t indulge here and there but I don’t plan on doing so until I am maintaining my goal and I have still have awhile before I get there.

– Tracking every single thing I eat & drink.  I love the weight watchers online program for this.  I have the app on my phone which makes it even easier to track.

– Brushing my teeth around 8pm to help me not want to snack or eat late night.

– Going to bed before 10pm (can’t eat when you are sleeping).

– Going to bootcamp 3 times a week as opposed to only 2 times.  This bootcamp is 55 minutes of strength training mixed with cardio.  It’s different every day.  No class is ever easy but I also can keep up (most of the time) and feel I accomplished a good challenge every time I leave.

– Doing 10-15 minutes of ab work before bed.  This is the current routine I am loving.  I have added some extra ab work on to the end too.

– Looking at cheesy motivation photos and quotes any time I want to skip a workout.

– I hung some dresses in plain sight in my bedroom that I would love to wear (and feel good wearing).

– Having a partner throughout the process.  My husband did this challenge with me and has been a great support system.  He pushes me to go to bootcamp when I am not feeling it and he appreciates the help I have given him with eating healthier.  (Side note: he came in 2nd place for men in the challenge!  Down 9 lbs!)

– Envisioning my upcoming trip to Aruba.  I just keep telling myself “bikini, bikini, bikini”.

– Blogging about it for the world (or my followers) to read.  This helps hold me accountable.  (You told them you were going to lose weight – can’t go back on your word!)

Just because this organized challenge is over doesn’t mean my personal challenge is.  As of this morning I still have 15 lbs to go until I reach my ultimate goal weight.  That number might change a bit based on muscle/fat ratio.  I want to be realistic and make sure I am at the healthiest weight for me.  Now that I fully accept that my diet is just as important (if not more important) than working out, I have a lot more confidence in actually attaining my goal.  Pretty sure I always knew this fact but just chose to ignore it.

I look forward to posting an update in a month or so.

What are some weight loss tips that work for you?  Comments appreciated.

photo

(one of those cheesy motivation photos I was talking about)

Tagged , , , , , , , , , ,